No products in the cart.
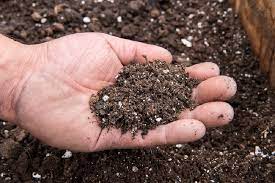
vermicompost diagram simple
vermicompost diagram simple
Vermicomposting, a natural process of turning organic waste into nutrient-rich fertilizer, has gained popularity among gardeners, farmers, and environmentally conscious individuals. But how does it actually work? In this article, we’ll explore the basics of vermicomposting through a simple diagram, breaking down the process into easy-to-understand steps. Whether you’re new to composting or looking to refine your skills, this guide will help you understand the magic happening inside a vermicompost bin.
Table of Contents
| Sr# | Headings |
|---|---|
| 1. | Introduction to Vermicomposting |
| 2. | Why Choose Vermicomposting? |
| 3. | Understanding the Vermicomposting Process |
| 4. | The Vermicompost Diagram Explained |
| 5. | Materials Needed for Vermicomposting |
| 6. | Setting Up Your Vermicompost Bin |
| 7. | Feeding the Worms: What to Include |
| 8. | Maintaining the Vermicompost Bin |
| 9. | Harvesting the Vermicompost |
| 10. | Using Vermicompost in Your Garden |
| 11. | Common Issues and Troubleshooting |
| 12. | Benefits of Vermicomposting |
| 13. | Conclusion: Start Your Vermicomposting Journey |
| 14. | FAQs |
Introduction to Vermicomposting
Have you ever wondered how your kitchen scraps could turn into rich, black gold for your garden? That’s where vermicomposting comes in. Vermicomposting is the process of using worms to decompose organic food waste, turning it into a valuable fertilizer known as vermicompost. This method is not only eco-friendly but also incredibly efficient, making it an excellent choice for anyone looking to reduce waste and enrich their soil.
Why Choose Vermicomposting?
Why should you consider vermicomposting over traditional composting methods? For starters, it’s faster. The worms break down organic matter more quickly than bacteria and fungi in traditional composting. Additionally, vermicomposting produces a higher-quality compost that’s packed with nutrients and beneficial microorganisms. If you’re looking to take your gardening game to the next level, vermicomposting is a fantastic option.
Understanding the Vermicomposting Process
Before diving into the diagram, it’s essential to understand the basic process of vermicomposting. At its core, vermicomposting involves worms eating organic waste and excreting it as worm castings, a nutrient-rich material that plants love. The process also involves several key components:
- Worms: Typically, red wigglers are used for vermicomposting.
- Organic Waste: Kitchen scraps like fruit peels, vegetable waste, and coffee grounds.
- Bedding Material: Shredded newspaper, cardboard, or coconut coir.
- Moisture and Oxygen: Worms need a damp environment with plenty of air.
The Vermicompost Diagram Explained
Let’s break down the vermicomposting process through a simple diagram:
1. The Worm Bin
The first component of our diagram is the worm bin, where all the magic happens. This bin is a container that houses the worms, bedding, and organic waste. It’s typically made of plastic or wood and has holes for ventilation.
2. Bedding Layer
At the bottom of the bin, you’ll find a layer of bedding material. This is where the worms will live and work. The bedding should be moist but not soaked, providing a comfortable environment for the worms.
3. Organic Waste Layer
Above the bedding, you’ll place your organic waste. This is the food that the worms will break down. It’s essential to avoid adding too much waste at once, as it can overwhelm the worms.
4. Worms
The stars of the show, the worms, are placed on top of the bedding. They’ll quickly burrow into the bedding and start working on the organic waste. As they eat, they produce worm castings, which are the main product of vermicomposting.
5. Ventilation Holes
Ventilation holes are crucial for maintaining the right environment in the bin. They allow oxygen to flow through the bin, preventing anaerobic conditions that can cause foul odors.
6. Moisture Control
Keeping the right moisture level is vital for successful vermicomposting. Too much moisture can lead to problems like mold, while too little can dry out the worms.
7. Harvesting Area
Once the worms have finished processing the organic waste, the vermicompost can be harvested. This is usually done by moving the finished compost to one side of the bin and adding fresh bedding and waste to the other side.
Materials Needed for Vermicomposting
To get started with vermicomposting, you’ll need a few essential materials:
- Worm Bin: A container with a lid and ventilation holes.
- Red Wigglers: The most common type of worm used in vermicomposting.
- Bedding Material: Shredded newspaper, cardboard, or coconut coir.
- Organic Waste: Kitchen scraps like fruit peels, vegetable waste, and coffee grounds.
- Moisture Source: A spray bottle of water to keep the bedding damp.
Setting Up Your Vermicompost Bin
Setting up your vermicompost bin is a straightforward process. Start by selecting a suitable container with a lid and drilling ventilation holes. Add a layer of moist bedding material, then introduce the worms. Finally, add your organic waste, making sure not to overwhelm the worms. Place the bin in a cool, dark area, and you’re ready to start composting!
Feeding the Worms: What to Include
When it comes to feeding your worms, not all organic waste is created equal. Here’s a quick guide on what to include and what to avoid:
What to Include:
- Fruit and vegetable scraps
- Coffee grounds and filters
- Tea bags
- Crushed eggshells
- Shredded paper and cardboard
What to Avoid:
- Meat and dairy products
- Oily foods
- Citrus peels in large amounts
- Onion and garlic
- Synthetic materials
Maintaining the Vermicompost Bin
Maintaining your vermicompost bin is all about balance. You’ll need to monitor moisture levels, ensure proper ventilation, and avoid overfeeding. Regularly check the bin for any signs of trouble, such as foul odors or excessive moisture, and make adjustments as needed.
Harvesting the Vermicompost
After a few months, your vermicompost will be ready for harvesting. To do this, move the finished compost to one side of the bin and add fresh bedding and waste to the other. The worms will migrate to the new food, leaving behind nutrient-rich vermicompost. You can then remove the compost and use it in your garden.
Using Vermicompost in Your Garden
Vermicompost is like a superfood for your plants. It’s rich in nutrients and beneficial microorganisms that improve soil structure and promote healthy plant growth. You can mix it into your garden soil, use it as a top dressing, or even brew it into a compost tea for watering.
Common Issues and Troubleshooting
Even with the best care, you might encounter some common issues in your vermicompost bin. Here’s how to address them:
- Foul Odors: This usually indicates too much moisture or a lack of ventilation. Add more bedding and ensure proper airflow.
- Worms Escaping: If the worms are trying to escape, it might be due to unfavorable conditions like too much light, heat, or a lack of food. Adjust the environment accordingly.
- Mold Growth: Mold is a sign of too much moisture. Reduce the amount of water you’re adding and increase ventilation.
Benefits of Vermicomposting
Vermicomposting offers a plethora of benefits, both for the environment and your garden. Not only does it reduce waste going to landfills, but it also produces a high-quality fertilizer that’s packed with nutrients. Additionally, the process is simple and can be done indoors, making it accessible to everyone, regardless of space limitations.
Conclusion: Start Your Vermicomposting Journey
Vermicomposting is a rewarding and environmentally friendly way to manage organic waste and create a nutrient-rich fertilizer for your garden. By understanding the simple process and following the steps outlined in this article, you’ll be well on your way to successful vermicomposting. Whether you’re a seasoned gardener or a beginner, vermicomposting is an excellent addition to your gardening practices.
FAQs
1. What types of worms are best for vermicomposting?
Red wigglers (Eisenia fetida) are the most commonly used worms for vermicomposting. They thrive in the environment of a compost bin and efficiently break down organic waste.
2. Can I use regular earthworms for vermicomposting?
Regular earthworms are not suitable for vermicomposting as they require different environmental conditions. Red wigglers are specifically adapted to the conditions in a compost bin.
3. How long does it take to produce vermicompost?
The process typically takes 3 to 6 months, depending on factors like the size of the bin, the number of worms, and the amount of organic waste added.
4. What should I do if my vermicompost bin starts to smell bad?
A foul odor usually indicates too much moisture or poor ventilation. Add more bedding material, ensure proper airflow, and avoid overfeeding the worms.
5. How do I harvest the vermicompost?
To harvest vermicompost, move the finished compost to one side of the bin and add fresh bedding and waste to the other side. The worms will migrate to the new food, allowing you to collect the compost from the other side.
Go and turn on towards organic farming to save future and thire save childs:
Elevate Plant Growth with Premium Bone Powder – Buy Now!
Organic Cow Dung Compost: Transform Your Garden Naturally
Premium Humic Acid for Healthy Plants | Enhance Soil & Boost Growth
Boost Plant Growth Naturally with Mustard Cake | Organic Fertilizer
Transform Your Garden with NPK Fertilizer | Boost Growth by 30%
Premium Perlite for Enhanced Gardening | Buy Now
Live Earthworms with Enhance Your Garden (soil health)
1 Neem Khali: Unveiling the Wonders of Nature
1Transform your garden with vermiwash-buy now
1 Premium quality Vermicompost [ केचुआ खाद ]
Follow us: